This post is a demonstration of running Nanos in MacOS and creating a unikernel with spring-boot application to deploy on aws cloud. I’ll not get into a concepts or architectur here. Please read my previously post The death of Linux Containers if you are looking for knowledge about Unikernels.
“Nanos is a new kernel designed to run one and only one application in a virtualized environment. It has several constraints on it compared to a general purpose operating system such as Windows or Linux — namely it’s a single process system with no support for running multiple programs nor does it have the concept of users or remote administration via ssh.”
So, let’s put the hands on the keyboard.
Requirement
You need Homebrew, AWS cli, JDK8 and Maven installed on your MacOS.
Dependencies
There are following dependencies should be installed before build Nanos.
1
2
3
4
5
brew update && brew install nasm go wget ent
brew tap nanovms/homebrew-x86_64-elf
brew install x86_64-elf-binutils
brew tap nanovms/homebrew-qemu
brew install nanovms/homebrew-qemu/qemu
Note: You will face a qemu problem when trying to compile Nanos because the MacOS has made changes to the hypervisor entitlements. The error is look like this:
1
2
3
qemu-system-x86_64: Error: HV_ERROR
fish: 'qemu-system-x86_64 \
    -machi…' terminated by signal SIGABRT (Abort)
To be more specific, the com.apple.vm.hypervisor entitlement (used in macOS 10.15) has been deprecated and replaced by com.apple.security.hypervisor.
To fix that, create an xml file named entitlements.xml with this content:
1
2
3
4
5
6
7
8
<?xml version="1.0" encoding="UTF-8"?>
<!DOCTYPE plist PUBLIC "-//Apple//DTD PLIST 1.0//EN" "http://www.apple.com/DTDs/PropertyList-1.0.dtd">
<plist version="1.0">
<dict>
    <key>com.apple.security.hypervisor</key>
    <true/>
</dict>
</plist>
Then sign the qemu binary with it:
1
codesign -s - --entitlements entitlements.xml --force /usr/local/bin/qemu-system-x86_64
And that is it, the qemu will work and able to launch VMs.
Building Nanos
Run the following command:
1
2
3
4
wget https://storage.googleapis.com/testmisc/target-root.tar.gz
mkdir target-root && tar xzf target-root.tar.gz -C target-root
export NANOS_TARGET_ROOT=./target-root
make run
The output will be something like this: 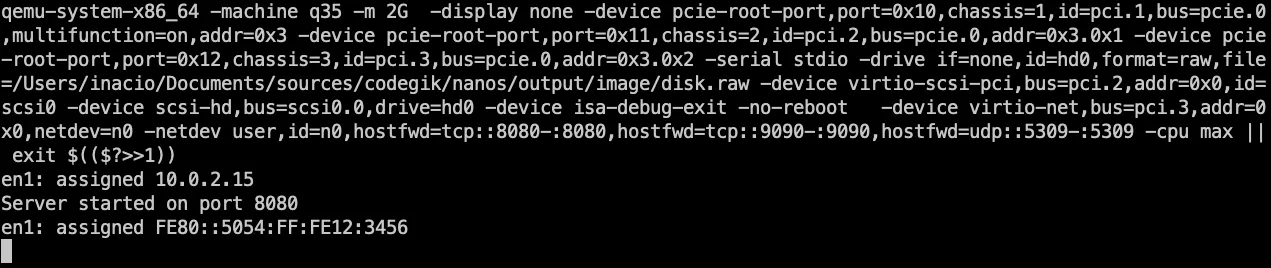
As you can see, the build was successful and the Nanos was loaded, the listen port is 8080, it is possible to access through telnet for testing. Than press control+c to stop running.
The first part it is done! Now you have Nanos able to create images. The next step will show how to manage the images with OPS.
Installing OPS
Ops is a tool for creating and running a Nanos unikernel. It is used to package, create and run your application as a nanos unikernel instance.
Run the following command to install OPS.
1
2
3
4
5
curl https://ops.city/get.sh -sSfL | sh
ops version
cp output/tools/bin/mkfs ~/.ops/0.1.34/
cp output/platform/pc/boot/boot.img ~/.ops/0.1.34/
cp output/platform/pc/bin/kernel.img ~/.ops/0.1.34/
Ok, now we have ops installed and Nanos built from MacOS.
Building images
I have the repository with a spring-boot application here: https://github.com/codegik/pocs/tree/master/devops/unikernel/spring-boot-hello
1
2
3
4
git clone https://github.com/codegik/pocs.git
cd pocs/devops/unikernel/spring-boot-hello/
mvn clean install
mkdir tmp
Please take a look at file config.json:
1
2
3
4
5
6
7
8
9
{
  "Args": ["-Dos.name=Linux", "-jar", "./target/hello-0.0.1-SNAPSHOT.jar"],
  "Dirs": ["target", "tmp"],
  "CloudConfig" :{
     "ProjectID" :"prod-1000",
     "Zone": "us-east-1",
     "BucketName":"nanos-images"
  }
}
Here is the configuration for ops to create the image wrapped with your application inside. The “CloudConfig” is the setup to send the image through AWS cli.
Build aws image
Make sure you have ~/.aws/credentials and ~/.aws/config are setup properly.
First of all, you need to create the S3 bucket with the same name and region found on config.json.
1
aws s3api create-bucket --bucket nanos-images --region us-east-1
Than create the image for aws like below:
1
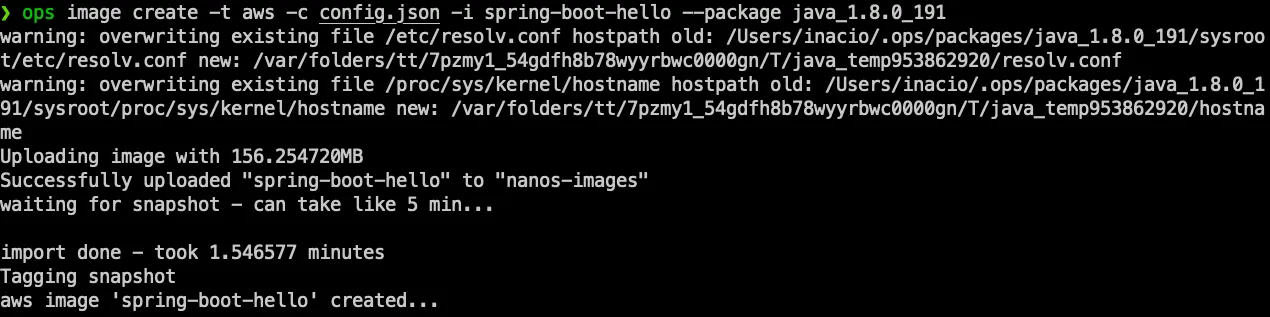
ops image create -t aws -c config.json -i spring-boot-hello --package java_1.8.0_191
The command will upload the image to the cloud automatically. This will take a time to finish the setup. We can see the output here:
Than we could check the image with the next command:
1
ops image list -t aws -z us-east-1

Now we are prepared to create the instance on aws cloud.
1
ops instance create spring-boot-hello -t aws -z us-east-1

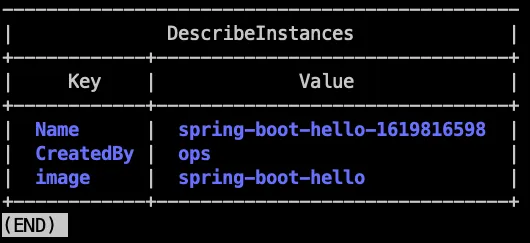
Than we could check the running instance on aws with the following commands:
1
2
aws ec2 describe-instances --filters "Name=instance-type,Values=t2.micro" --query "Reservations[].Instances[].Tags" --output table
ops instance list -t aws -z us-east-1

To delete the instances from aws and locally, we could run the commands:
1
2
ops instance delete spring-boot-hello-1619816598 -t aws -z us-east-1
ops image delete spring-boot-hello -t aws -z us-east-1
Conclusion
Nanos has other packages to build many different images, like C, Java, Node, Python, Go, etc. But I choose Java + spring-boot for this POC; Nanos is very fast to create an image; it takes less than 2 seconds, it’s very impressive. The pre-built packages for each programing language are the key that allows the incredible velocity of building images.
The ops program is very useful, and it has a lot of commands that make management very easy. It looks like a docker command-line tool.
That is it for today. I hope this POC give some insights to you, like creating a CI/CD script to deploy your apps.
This is my contribution, stay close to see the next posts.
Cheers!